

Mageia-<version>-netinstall-<arch>.iso (former known as Boot.iso) is a small image that contains no more than that which is needed to start the drakx installer and find either:
- сарчашмаҳои онлайн (ё оинаи маҳаллӣ)
- тасвири ISO дар диски компютерии маҳаллӣ ё дар диски USB
- тасвири ISO дар диски CD/DVD ROM
- тасвири ISO дар LAN (шабакаи компютерии маҳаллӣ)
барои идома додан ба ба анҷом расонидани насб
The Mageia-<version>-netinstall-nonfree-<arch>.iso (former known as boot-nonfree.iso) contains additional proprietary device drivers, which may be required for your network device, disk controller or, perhaps other device.
Note
The Mageia-<version>-netinstall-nonfree-<arch>.iso and Mageia-<version>-netinstall-<arch>.iso files can be used to launch a network install over a wired or wifi unencrypted network. (Encrypted wifi or bluetooth not allowed)
Warning
Unlike when installing from DVD or LiveCD, during the first part of the installation, Stage 1, you will be asked to type things. During this stage, your keyboard will respond like an American keyboard. This can be very confusing when you need to type names and paths.
You can find the Mageia-<version>-netinstall-nonfree-<arch>.iso and Mageia-<version>-netinstall-<arch>.iso here. It is called Network Installation.
You can also download these images from whatever mirror you want in this
list http://mirrors.mageia.org/.
Just follow the
path /distrib//cauldron/$ARCH/install/images/ where
$ARCH is i586 or x86_64.
After downloading the image, burn it on a CD/DVD or, if you prefer to put it on a USB stick, follow the instructions here.
This step is also called Stage 1
The first screen to appear is this one
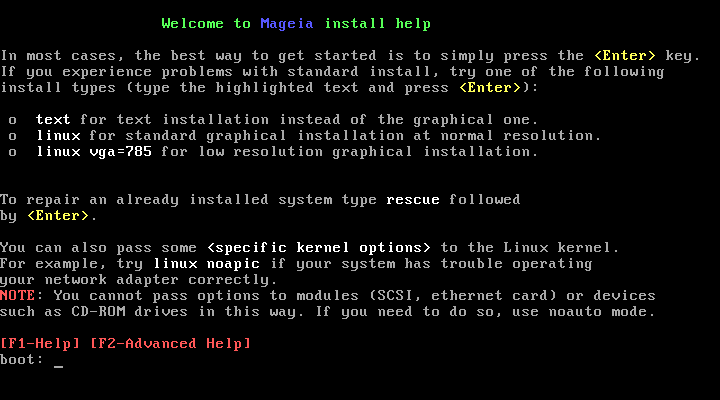
When booting up, you can choose to read the advanced help by pressing F2 and return to the installer screen with F1. If you don't choose one, the boot will continue with default settings.
The first screen to appear is this one
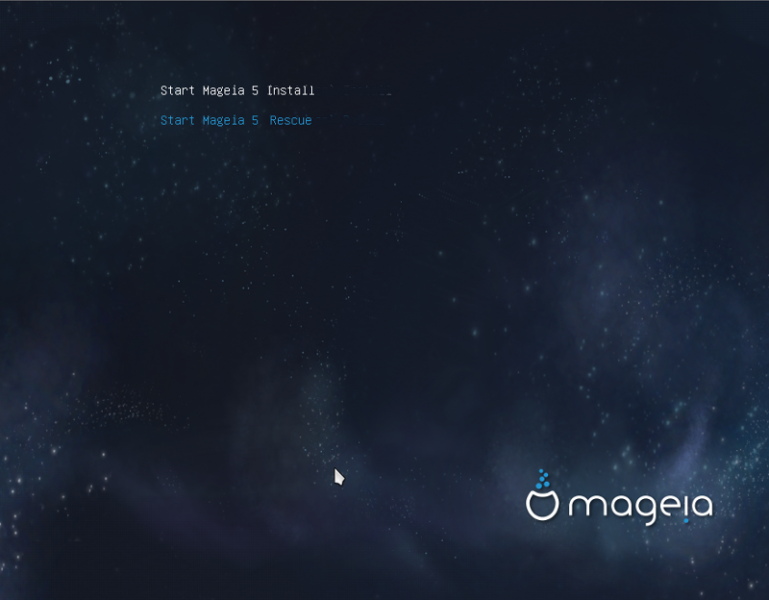
Use the arrow keys to select and press .
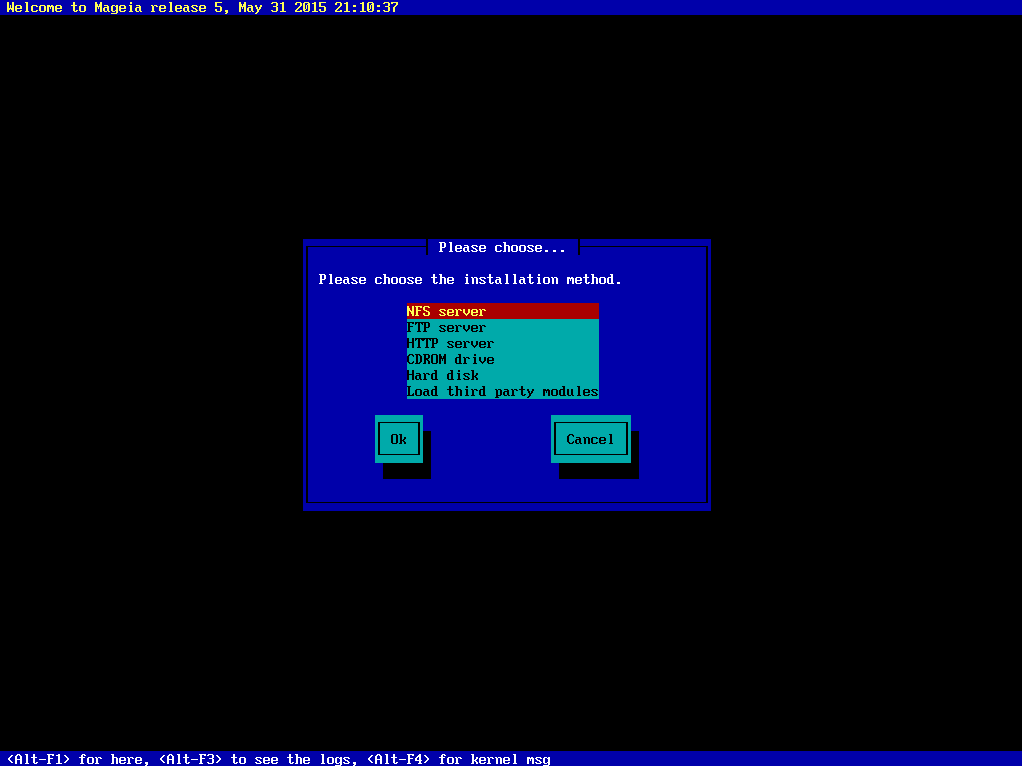
Баъд аз ин шумо экрани зеринро мебинед:

During Stage 1, nothing will be written to your Hard Disk, so it is safe at any point to quit. You can do so by pressing .
You can use to read the logs and to return to the installer screen.
Use the arrow keys to move down and up the list, until your method of choice is highlighted.
If you don't know what to choose for a Network Installation, choose .
On an enterprise network, FTP and rsync may be blocked, so using HTTP server is a good choice in this case.
Press the tab key until is highlighted and then press .
For an installation from hard disk or USB stick, see below.
If you have several network cards, choose the right one.
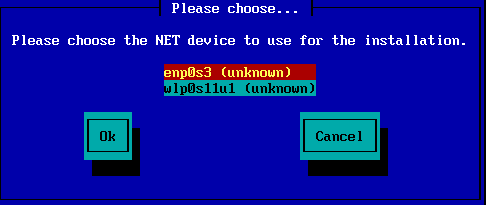
If you don't know what to choose, choose DHCP


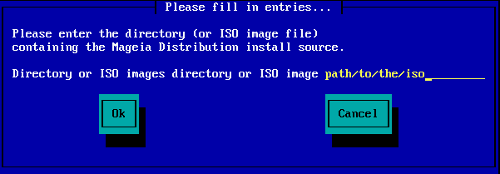
If you choose to specify the mirror manually, you'll have to type the path to your preferred medium. This can be very hard if you don't have an American keyboard.
Selecting the "Mageia" option will give you a list you can choose from by moving up and down with the arrow keys.

Whichever server you choose, listed here, it should use the same tree-like structure from "mageia" (or "Mageia") as used by the official Mageia mirrors. That means .../mageia/distrib/<version>/<arch>
A correct entry (when using an official mirror) in the "Mageia directory" field below, could be:
pub/linux/mageia/distrib/cauldron/i586
Another example for Mageia 5 x86_64 would be:
pub/Mirrors/Mageia/distrib/5/x86_64.
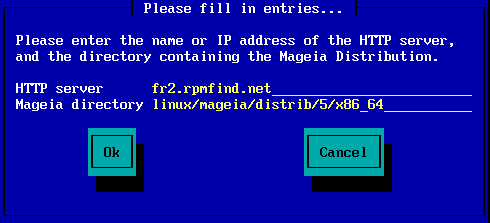
Other mirrors may have a different structure and the screenshots below show such examples:
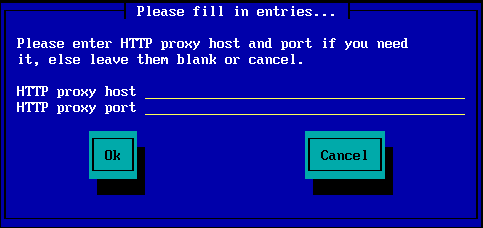
Агар шумо сервери HTTP-ро интихоб кунед:
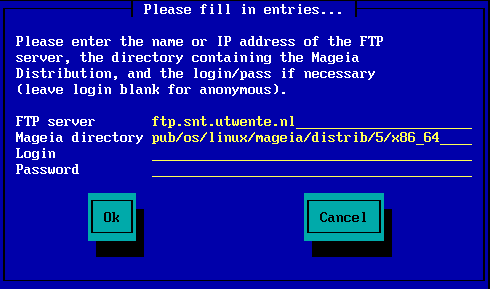
Агар шумо сервери FTP-ро интихоб кунед:
If you get a lot of missing dependency errors later in the install, reboot and try a different mirror.
After choosing an FTP server, you get a screen where you can add a login name and password if required.
After this step, Stage 2 will be installed and started


This is the first Stage 2 screen, see Installing - Stage 2 below:


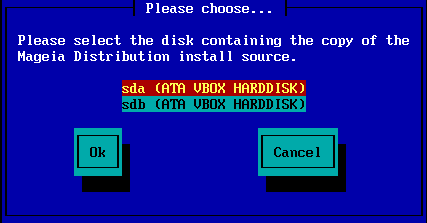
If you choose to install from hard disk or USB stick, you must know where the iso file is saved. First, select your hard drive (or USB stick)
and then the partition

Then specify the directory or the file name of the iso. Leaving open or using the directory is easier, because the installer then offers you a list of directories and files, from which you can select with up and down arrows, as seen by the second image.

The first screen you see now, is the "Please choose a language to use" screen. Nothing has been written to your HD yet. If you want to reboot, go to tty2 with ctrl+alt+F2 and press ctrl+alt+del. (ctrl+alt+F7 to come back if you change your mind).
This part of the install is the same as shown in http://doc.mageia.org/installer/5/en/content/selectLanguage.html. Please click the link to continue reading and change the "5" in the URL to the version you are installing.
